
A clean camera lens is essential for capturing stunning, high-quality images.
Dust, fingerprints, and smudges can negatively impact your photography, resulting in blurry, unclear shots.
In this guide, we’ll cover the best practices for cleaning your camera lens, including essential tools, do’s and don’ts, step-by-step instructions, advanced techniques, and lens maintenance tips.
By following these guidelines, you’ll ensure that your lens remains in optimal condition and that your images are always sharp and clear.
A dirty camera lens can significantly degrade the quality of your images.
Dust, dirt, and smudges can cause a loss of contrast, soft focus, or spots in your photos.
By regularly cleaning your lens, you’ll maintain its optical performance, extend its lifespan, and ensure that your images are always crisp and clear.
Proper cleaning techniques can help prevent damage to the lens coating, which is essential for maintaining image quality and protecting your investment.
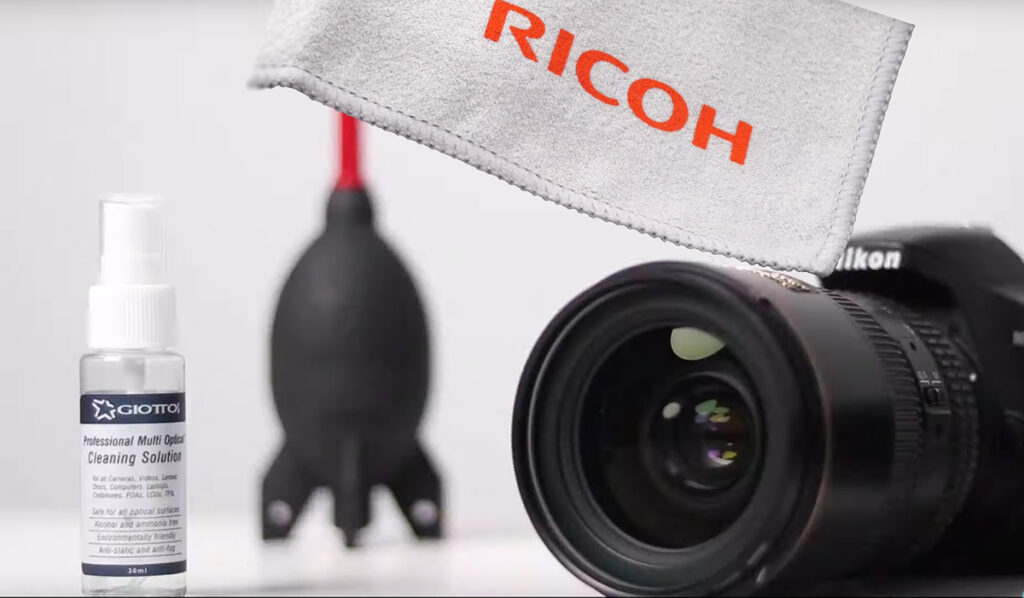
Essential Cleaning Tools For Your Camera Lens
To clean your camera lens properly, you’ll need the following tools:
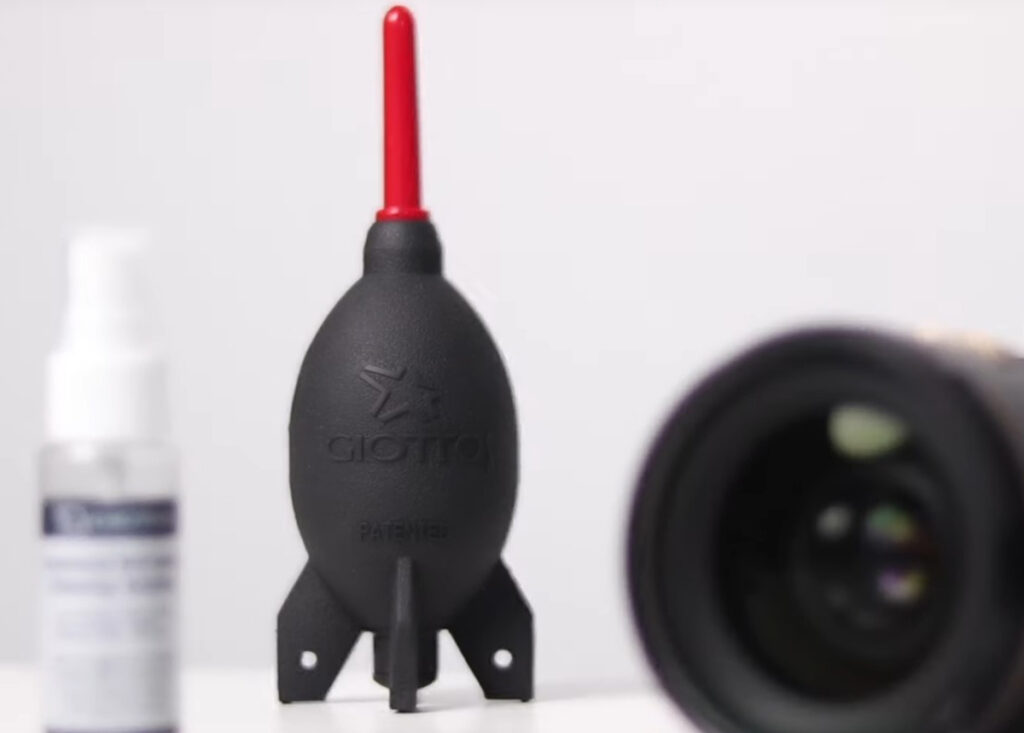
Air blower
A small, handheld device that blows a stream of air to remove dust and debris from your lens. Choose a high-quality blower with a filter to prevent blowing additional dust onto the lens.
Avoid using canned air, as it can potentially damage your lens or introduce harmful chemicals.
Lens brush
A soft-bristled brush specifically designed for cleaning camera lenses. The fine bristles help to remove dust and debris without scratching the lens. Opt for a brush with a retractable design to keep the bristles clean and dust-free when not in use.
Lens cleaning solution
A specialized liquid cleaner that’s safe to use on camera lenses. Look for a solution that’s alcohol-free, non-abrasive, and specifically formulated for cleaning optical glass.
Microfiber cleaning cloth
A soft, lint-free cloth that’s perfect for removing fingerprints, smudges, and streaks. Choose a high-quality cloth designed for cleaning optical surfaces, and make sure to use a clean cloth each time you clean your lens.
Lens cleaning tissue
Disposable, lint-free tissues designed for single use. These tissues can help prevent cross-contamination between lenses and are a gentle alternative to reusable microfiber cloths.
Lens cleaning pen
A double-sided pen that features a soft brush on one end and a carbon-based cleaning pad on the other. The cleaning pad is useful for removing stubborn smudges and fingerprints. Select a pen with a retractable brush to keep it clean between uses.
Camera Sensor loupe
A magnifying tool with built-in LED lights that helps you see dust and debris on your lens more clearly. This tool can be especially helpful when cleaning lenses with small or intricate elements.

When to Clean Your Camera Lens
It’s essential to clean your lens regularly, but how often depends on your shooting habits and environment.
Check your lens for visible dust, debris, or smudges before each shoot. If you frequently shoot in dusty or dirty environments, you may need to clean your lens more often.
Additionally, it’s a good idea to perform a thorough cleaning of your lens after extended periods of storage or before important events, like a wedding or a professional photo shoot, to ensure your gear is in top condition.
There is an alternative method for determining if your camera lenses require cleaning:
- Focus at Infinity: Set your lens to manual mode and focus on the most distant object possible. Afterward, lock the focus or avoid touching the focus ring.
- Choose a Narrow Aperture: Adjust the lens to a narrow aperture, such as f/16.
- Capture an Image: Point the lens at a plain white surface or a clear blue sky and take several photos.
- Inspect for Imperfections: Examine the image on the camera LCD or a computer, zooming in to check every area of the frame.
- Identify Issues: If you notice dark spots, streaks, or lines, the sensor may need cleaning.
Camera Lens Cleaning: Do’s and Don’ts
To avoid damaging your lens, follow these guidelines:
Do’s:
- Always use a blower, brush, or microfiber cloth to remove loose dust and debris before using any liquid cleaning solution.
- Clean your lens in a well-lit area, so you can easily see any remaining dust, smudges, or streaks.
- Store your cleaning tools in a clean, dust-free environment to avoid transferring dirt onto your lens.
- Handle your lens with clean hands to minimize the risk of transferring oils, dirt, and other contaminants.
- Be patient and gentle while cleaning your lens to avoid causing scratches or other damage.
Don’ts:
- Don’t use canned air, as it can damage your lens or introduce harmful chemicals.
- Don’t use your breath to clean your lens, as it can introduce moisture and bacteria.
- Avoid using household cleaners, as they may contain harsh chemicals that can damage your lens.
- Don’t touch the lens surface with your fingers, as this can leave oils and smudges behind.
- Never disassemble your lens for cleaning, as this can void your warranty and potentially cause irreversible damage.
Step-by-Step Guide to Cleaning Your Camera Lens
This is how professional photographers maintain their camera lenses.
Try doing this lens-cleaning the next time you return from a photoshoot.
Follow these steps to clean your lens safely and effectively:
- Prepare your cleaning tools and workspace.
Make sure you have all the necessary tools and a clean, well-lit area for cleaning your lens. - Remove any loose dust and debris.
Use an air blower or lens brush to gently remove any visible dust and debris from the lens. Hold the lens facing downward to prevent dust from settling back onto the lens when using a blower.
Doing this step first is crucial, as using a cloth beforehand may cause scratches on the glass while wiping away dust particles.
In well-lit conditions, with the lens facing upward, blow air across the lens at a 45-degree angle, moving from one side to the other.
Using a lens blower is preferable to blowing with your mouth, as it prevents the risk of accidentally spitting saliva onto the lens and moisture.
A blower allows for quick, consecutive puffs of air from one side to the other.
To achieve similar dust removal results, use a soft-bristled brush. If stubborn dust or dirt specks are present on the lens, a blower may not be effective.
A lens brush can also reach tight grooves around the lens glass edges.
With the lens facing upwards, employ gentle sweeping motions from one side of the lens to the other.
Avoid pressing down too hard on the brush, as it may scratch the lens if a large particle gets caught in the bristles.
- Apply the cleaning solution.
After brushing and blowing away larger dust and dirt particles, it’s time for a more thorough cleaning.
Place a few drops of lens cleaning solution onto the microfiber cloth or lens cleaning pen. You can also use lens-cleaning tissues or paper.
Never apply the cleaning solution directly onto the lens, as it can cause damage if it seeps into the lens barrel or camera body.
Using a proper lens cleaning solution ensures that you won’t damage the protective coatings applied by the lens manufacturer to the glass. Avoid using Windex, Glen20, or any other chemical cleaning fluids.
Fold a lens cleaning paper or tissue and apply 3-5 drops of lens cleaner onto it. With the lens facing upright, hold it securely with one hand.
Using your other hand, gently wipe across the lens surface with the damp lens-cleaning tissue. If possible, use a side-to-side motion rather than a spiral motion. Wiping in a circular motion can spread particulates over clean areas.
Note: This is a particular detail that I think Adorama gets wrong in their lens-cleaning article.
Once you’ve wiped the entire lens surface, take a clean and dry piece of lens-cleaning tissue and gently remove any remaining moisture.
Allow the lens to dry completely, and inspect the surface to ensure the removal of smudges, oils, fingerprints, and stubborn dirt.
If needed, repeat this step to achieve streak-free glass.
Alternatively, you can use a wipe made for lenses.
- Dry the lens surface.
After using liquid camera lens cleaner, make sure you wipe it all off with either a clean microfiber lens cloth or lens-cleaning tissue. Do not use regular tissues,, as they could scratch your lens.
Keep in mind that performing this step before the previous steps may cause dust to be dragged across the lens surface, resulting in scratches.
Depending on the cloth’s size, fold it into a padded square or triangle shape.
With the lens facing upward and securely held in one hand, hold the folded microfiber cloth in the other.
Gently wipe the glass to eliminate any remaining streaks from the cleaning solution.
- Check for any remaining smudges or streaks.
Inspect the lens in a well-lit area to ensure that all dust, smudges, and streaks have been removed. If necessary, repeat steps 3 and 4 until the lens is completely clean.
Pro Tip: Use a sensor loupe
A sensor loupe is a magnifying tool with built-in LED lights that helps you see dust and debris on your lens more clearly. This can be especially helpful when cleaning lenses with small or intricate elements.
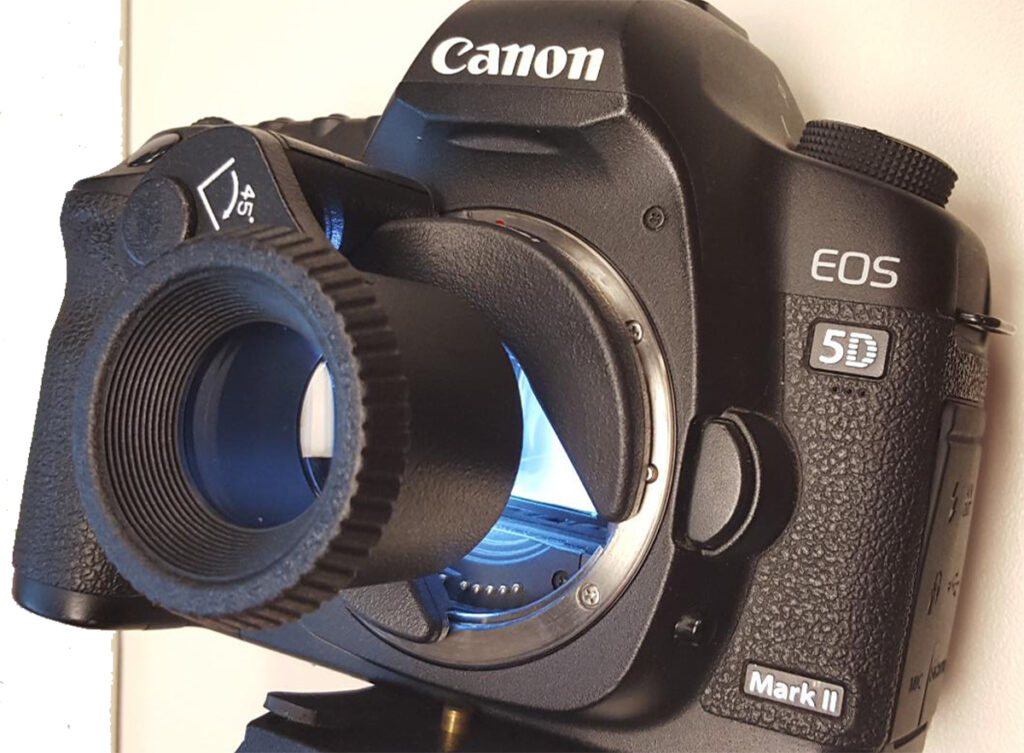
- Clean the lens mount.
Use a dry microfiber cloth or lens brush to gently remove any visible dust or dirt from the lens mount. This will help ensure a secure connection between the lens and the camera body and prevent dust from entering the camera. - Reassemble and store your gear.
Once your lens is clean, carefully reattach it to the camera body or place it in its designated storage area. Always use a lens cap to protect the lens when not in use.
How to Clean Your Lens Filters
Lens filters also need regular cleaning, as they can collect dust, fingerprints, and smudges that can impact your image quality. Follow these steps to clean your lens filters:
- Remove the filter from the lens.
This will make it easier to clean and help prevent any dust or debris from entering the camera body. - Clean the filter using the same tools and techniques as described for cleaning your camera lens.
Be sure to clean both sides of the filter, as dirt and smudges can accumulate on both surfaces. - Inspect the filter for any remaining dust, smudges, or streaks, and repeat the cleaning process if necessary.
- Carefully reattach the filter to the lens, making sure it’s securely fastened and free of dust and debris.
Maintaining Your Camera Lens
In addition to regular cleaning, proper lens maintenance is essential for preserving the performance and longevity of your camera lens. Follow these tips to keep your lenses in top condition:
- Always use a lens cap when your camera is not in use. This will protect your lens from dust, dirt, and potential scratches.
- Store your camera and lens in a clean, dry environment. A well-maintained camera bag with padded compartments is ideal for protecting your gear.
- Avoid exposing your lens to extreme temperatures or humidity, as this can cause condensation and mold growth.
- Keep your hands clean while handling your camera and lens to prevent transferring oils, dirt, and other contaminants.
Bonus Tips for Camera Lens Care
In addition to the cleaning and maintenance techniques discussed earlier, here are a few bonus tips to help you take even better care of your camera lens:
Invest in a lens hood
A lens hood can protect your lens from accidental bumps, scratches, and stray light. By reducing lens flare and increasing contrast, a lens hood can also improve the overall quality of your images.
Use protective filters
A high-quality UV or clear protective filter can help shield your lens from dust, dirt, and scratches without affecting image quality. Just be sure to choose a filter that’s compatible with your lens and clean it regularly, as you would with your lens.
Regularly inspect the lens
Developing a routine for inspecting your camera lens can help you catch potential issues early and ensure that your gear is always ready for use.
How often should you clean my camera lens?
Ideally, clean your camera lens only when necessary and as sparingly as possible. However, certain situations may demand lens cleaning multiple times a day or even during a single shoot.
Upon removing the lens cap, inspect the front element of your lens. If you spot dust, smudges, lint, or water spots, it’s a good idea to clean your camera lens before starting to shoot.
Before attaching a new lens to your camera, examine both the front and rear lens elements. If you detect any smudges or dust on the rear element, clean it before connecting the lens to your camera body. Failing to do so may result in debris entering your camera or sensor.
During rainy conditions, windy days, or any other situation that may expose your gear to smudges or foreign objects, periodically check your lens and perform a quick lens cleaning as required.
Learn about your lens’s specific care requirements
Consult your lens’s user manual or visit the manufacturer’s website to learn about any specific care instructions or recommendations.
Following these guidelines can help you avoid inadvertently damaging your lens and keep it in top condition.
Educate yourself about lens storage
Learn how to store your lenses properly when not in use. Store your lenses in a cool, dry place with silica gel packets to control humidity.
Keep your lenses upright and avoid stacking them on top of each other to prevent scratches and pressure on the lens elements.
Carry a lens-cleaning kit
When you’re out shooting, it’s essential to have your lens-cleaning tools readily available. Pack a small lens cleaning kit in your camera bag, including an air blower, lens brush, microfiber cloth, and lens cleaning solution, so you can quickly and effectively clean your lens on the go.
By incorporating these bonus tips into your lens care routine, you’ll be well-equipped to handle any situation that may arise during your photography adventures.
With a clean and well-maintained lens, you can focus on capturing beautiful, high-quality images that showcase your skills and creativity.
Conclusion
Properly cleaning and maintaining your camera lens is crucial for capturing stunning, high-quality images.
By following the guidelines and techniques outlined in this guide, you’ll keep your lens in optimal condition and ensure that your images are always sharp and clear.
B&H also has some rules to follow.
Remember to clean your lens regularly, use the right tools, and practice proper lens maintenance to preserve the performance and longevity of your camera lens.
With the right care and attention, your lens will serve you well for a lifetime and the next generation.